Getting started with Extras
When you purchase Extras you are given 3 files in zip format. The three files correspond to the last 3 versions of Extras. We give access to the last three versions in case you need to reinstall an earlier version. You should first install the version with the highest number of the three.
Installing and activating Extras
After you download the latest version of Extras, go to your WordPress admin, Plugins > Add new > Upload plugin (top left corner). Install Extras just like you would any WordPress plugin.
You will notice a new menu item in the WordPress admin under the Elementor menu item called Extras. Here you access the Extras’ settings and license activation screen. Learn more about activating your license.
Understanding extensions
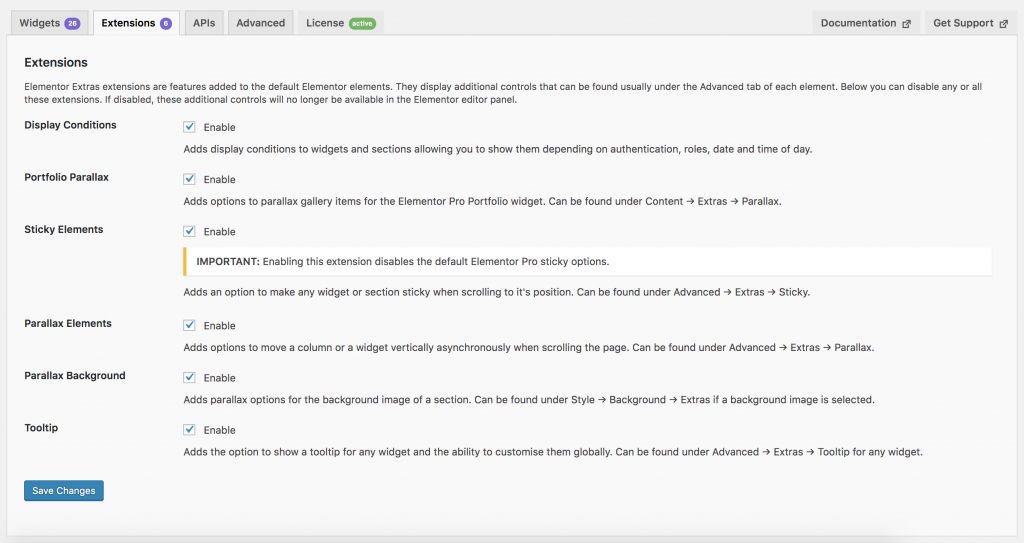
Extras extensions are features added to the default Elementor elements. They display additional controls that can be found usually under the Advanced tab of each element. Below you can disable any or all these extensions. If disabled, these additional controls will no longer be available in the Elementor editor panel.
Most extra controls are added to widgets, columns and sections in the Advanced > Extras tab. The parallax background extensions adds parallax options for the background image of a section. They can be found under Style > Background > Extras on a settings’ editor panel if a background image is selected. All information regarding where to find extension control can be found on the Extensions page:
Enabling and disabling widgets and extensions
Extras allows you to disable any widget or extension you don’t plan on using. Simple go to Elementor > Extras > Widgets tab to disable / enable widgets and Elementor > Extras > Extensions tab to disable extensions.
When disabled, widgets no longer appear in the editor panel widgets list and the assets they use are no longer loaded on the page, decreasing the load time of the page and the Elementor editor.
Similarly, when you disable extensions, the controls added to elements disappear as well as the javascript files associated with them.
Updating to official releases
When you update to an official release, there are a couple of things you can do to make sure everything runs smoothly and there are no surprises:
- We recommend updating on development or staging websites first to make sure you understand what happens and that there are no issues with what visitors see.
- Do a cleanup of the CSS files generated by Elementor. Go to Elementor > Tools and click Regenerate Styles. This will make sure any new controls that generate CSS through Elementor are used when building the CSS files.
- If you’re using a caching plugin, make sure you clear your cache.
- See the changelog for important notes on what changes were made in that update and if we suggest you have a look at your Elementor widget settings, please do so.
Updating to beta releases
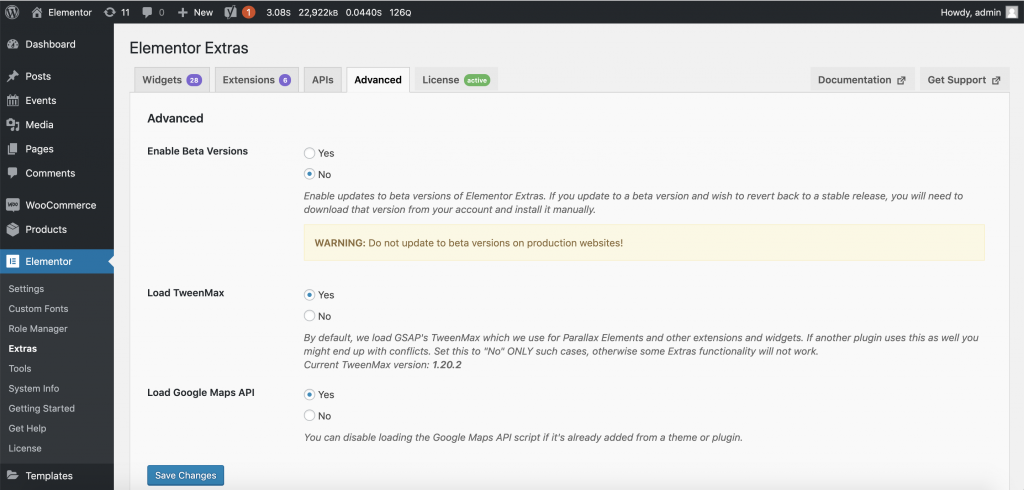
Sometimes we make beta releases available to you for testing. Testing beta version is important as it helps us discover bugs that we cannot test due to specific environment scenarios and plugins / theme combinations. You can receive beta updates if you go to Elementor > Extras > Advanced and set Enable Beta Versions to YES. Do not update to Beta releases on public websites, as these are released for testing purposes only.
Enabling and disabling widgets and extensions
Extras allows you to disable any widget or extension you don’t plan on using. Simple go to Elementor > Extras > Widgets tab to disable / enable widgets and Elementor > Extras > Extensions tab to disable extensions.
When disabled, widgets no longer appear in the editor panel widgets list and the assets they use are no longer loaded on the page, decreasing the load time of the page and the Elementor editor.
Similarly, when you disable extensions, the controls added to elements disappear as well as the javascript files associated with them.